Quickstart: Sign up, sign in to Azure DevOps
Azure DevOps Services
In this quickstart, you learn how to sign up for Azure DevOps for free, sign in with a Microsoft or GitHub account, create an organization, create a project, and invite your teammates.
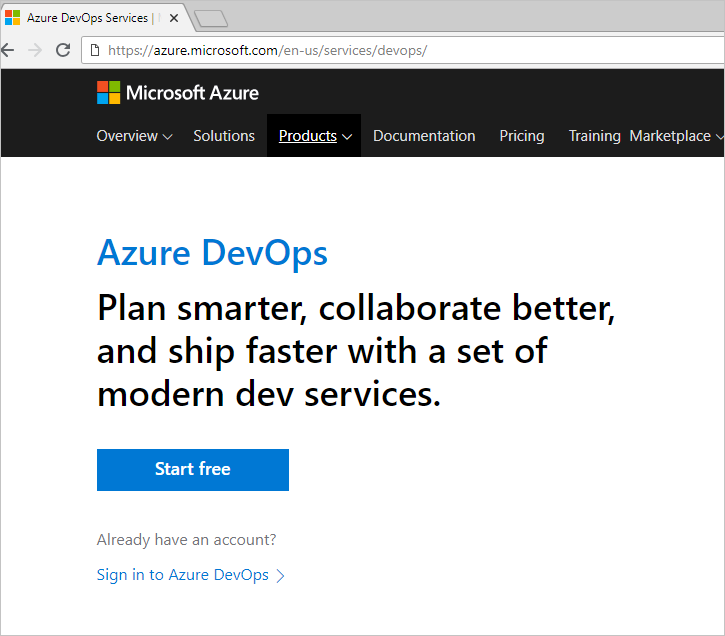
Sign up for Azure DevOps to upload and share code in free, unlimited private Git repositories.
Then, connect to your favorite development tool like Eclipse, Xcode, Visual Studio, IntelliJ, or Android Studio to work on apps anytime, anywhere.
Sign up with a personal Microsoft account
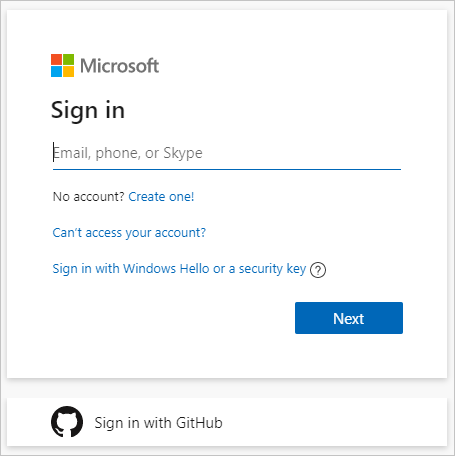
- Select the sign-up link for Azure DevOps.
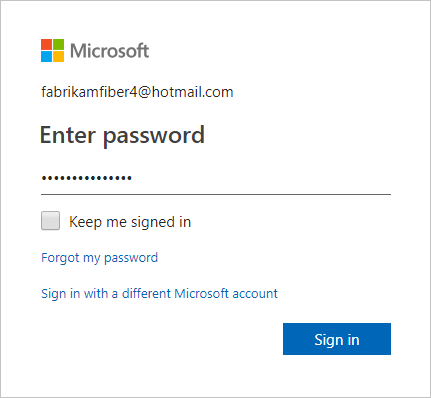
- Enter your email address, phone number, or Skype ID for your Microsoft account. If you're a Visual Studio subscriber and you get Azure DevOps as a benefit, use the Microsoft account associated with your subscription. Select Next.
 If you don't have a Microsoft account, choose Create one. To learn more, see create a Microsoft account.
 - Enter your password and select Sign in.
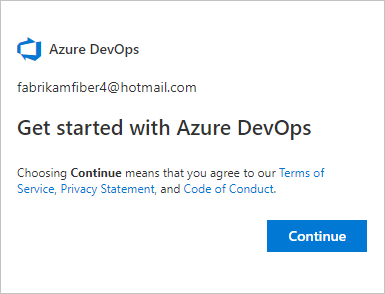
- To get started with Azure DevOps, select Continue.
An organization is created based on the account you used to sign in. Sign in to your organization at any time, (
https://dev.azure.com/{yourorganization}).
You can rename and delete your organization, or change the organization location. To learn more, see the following articles:
If you signed in with an existing Microsoft account, your next step is to Create a project. If you signed in with a newly created Microsoft account, then your project is automatically created and named after your account name. To learn more about managing projects, see Manage projects.
Sign up with a GitHub account
Important
If your GitHub email address is associated with an Azure AD-backed organization in Azure DevOps, you can't sign in with your GitHub account, rather you must sign in with your Azure AD account.
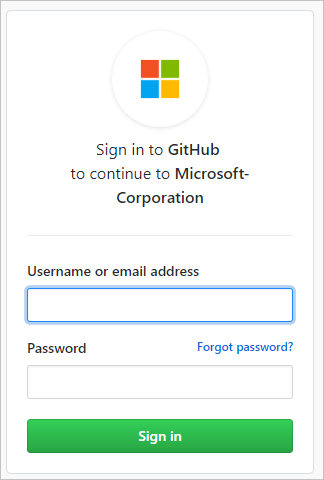
- Select the sign-up link for Azure DevOps, Start free with GitHub. If you're already part of an Azure DevOps organization, select Sign in to Azure DevOps.
- Select Sign in with GitHub.
 If you have an account in session already, select Use another account. You're taken to GitHub sign-in where you can enter your GitHub user name or email address.
 - Enter your GitHub account credentials, and then select Sign in.
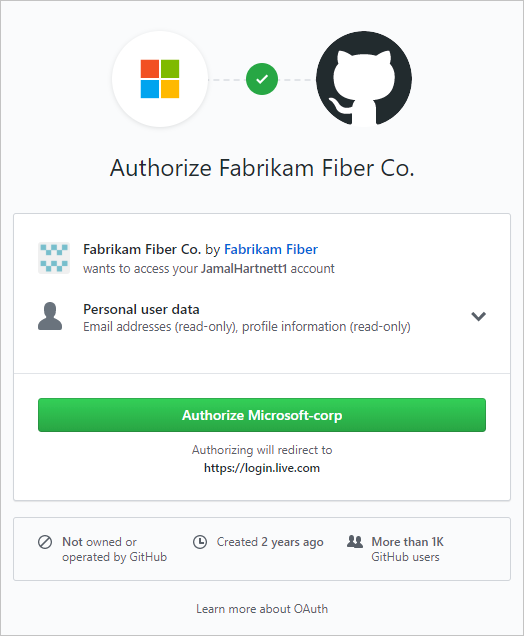
- Select Authorize Microsoft corporation.
- To get started with Azure DevOps, select Continue.
An organization is created based on the account you used to sign in. Sign in to your organization at any time, (
https://dev.azure.com/{yourorganization}).
You can rename and delete your organization, or change the organization location. To learn more, see Manage organizations.
Enable GitHub invitations
Creating a new Azure DevOps organization with your GitHub username turns on the Invite GitHub users policy by default. For existing organizations, your administrator can turn on this capability via Organization settings > Policies tab.
Once the setting is changed, sign out of Azure DevOps, and then from a fresh browser session, sign back in to the organization
dev.azure.com/{organizationName} or organizationName.visualstudio.com with your GitHub credentials. You're now recognized as a GitHub user and the GitHub invitation experience is available to you.
For more information about GitHub authentication, see FAQs.
Create a project
If you signed up for Azure DevOps with a newly created Microsoft account (MSA), your project is automatically created and named based on your sign-in.
If you signed up for Azure DevOps with an existing MSA or GitHub identity, you're automatically prompted to create a project. You can create either a public or private project. To learn more about public projects, see What is a public project?.
- Enter information into the form provided, which includes a project name, description, visibility selection, initial source control type, and work item process.
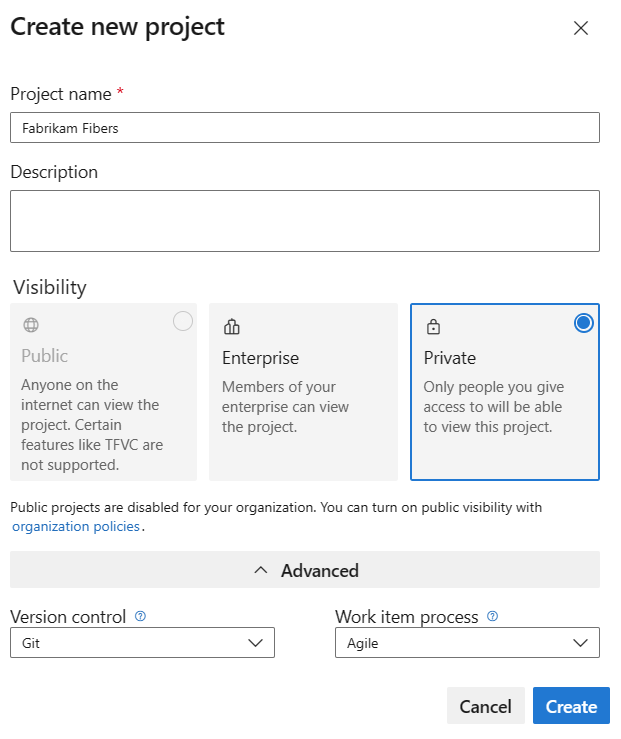 See choosing the right version control for your project and choose a process for guidance.
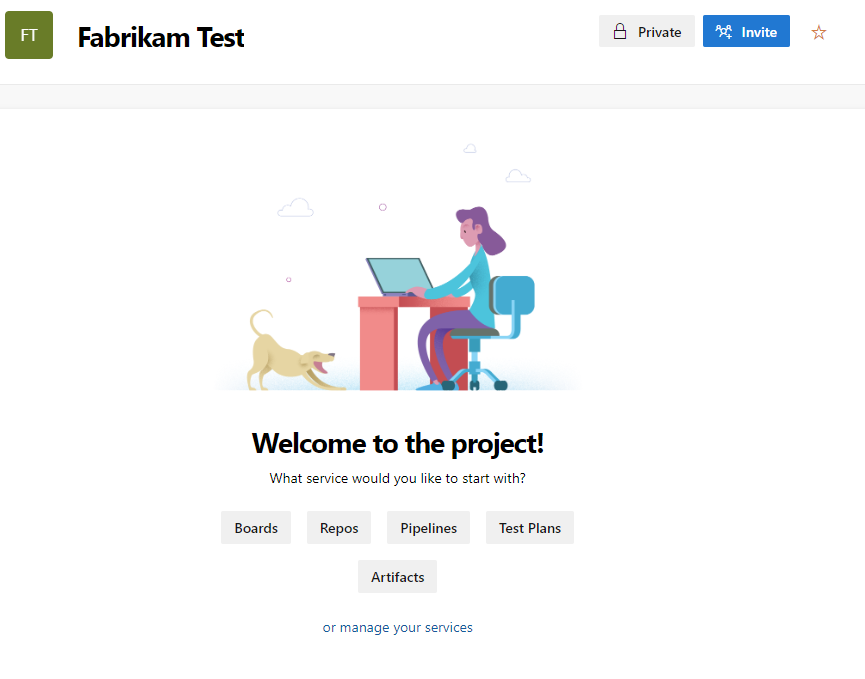
 - When your project is complete, the welcome page appears.
Invite team members
Give team members access to your organization by adding their email addresses or GitHub usernames to your organization. For GitHub user invitations, ensure you've enabled the policy, Invite GitHub users in Organization settings > Policies tab.
- Sign in to your organization (
https://dev.azure.com/{yourorganization}). - Select
 Organization settings.
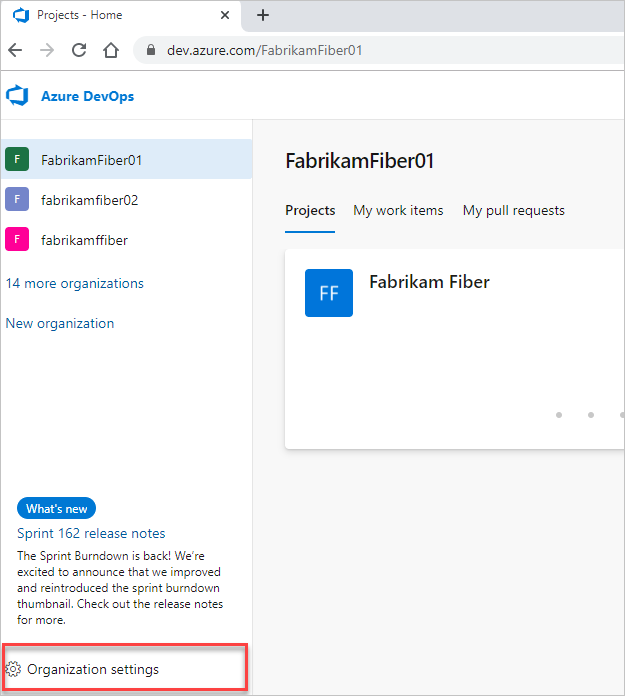
- Select Users > Add new users.
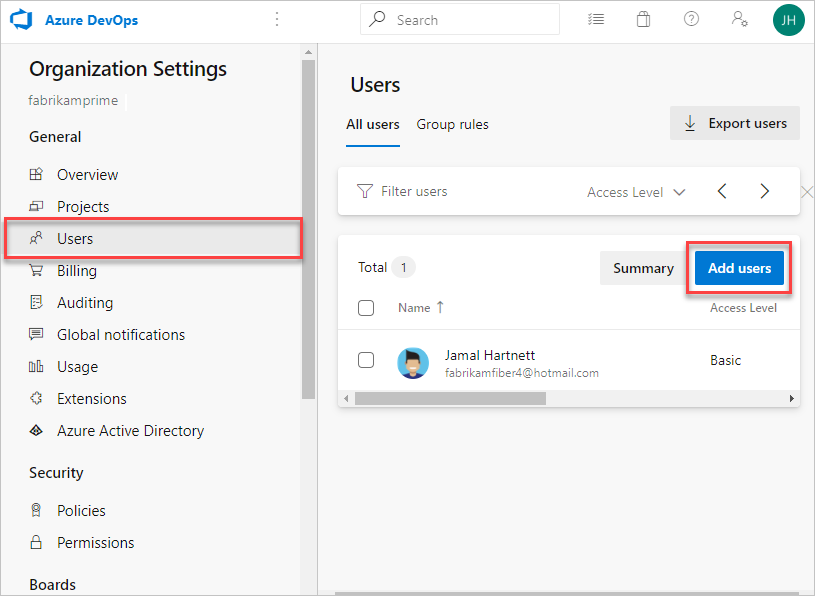
- Enter the following information:
- Users: Enter the email addresses (Microsoft accounts) or GitHub usernames for the users. You can add several email addresses by separating them with a semicolon (;). An email address appears in red when it's accepted.
- Access level: Leave the access level as Basic for users who will contribute to the code base. To learn more, see About access levels.
- Add to project: Select the project you want to add them to.
- DevOps Groups: Leave as Project Contributors, the default security group for users who will contribute to your project. To learn more, see Default permissions and access assignments.
NoteAdd email addresses for personal Microsoft accounts and IDs for GitHub accounts unless you plan to use Azure Active Directory (Azure AD) to authenticate users and control organization access. If a user doesn't have a Microsoft or GitHub account, ask the user to sign up for a Microsoft account or a GitHub account. - When you're done, select Add to complete your invitation.
For more information about managing users and organization access, see Add organization users for Azure DevOps.