Friday, November 3, 2023

REST API Design Patterns

 uncommon scenarios.

Types of API Design Patterns

Following are some of the commonly used API design patterns:

  1. RESTful API:

  • Uses HTTP methods to interact with resources
  • Supports caching and scalability
  • Works well for CRUD (Create, Read, Update, Delete) operations
  • Allows for stateless communication between client and server
  • Can be used with a variety of programming languages and frameworks

2. RPC API:

  • Uses Remote Procedure Calls to interact with a remote server
  • Typically requires a protocol or API definition, such as Protobuf or gRPC
  • Can be more efficient than RESTful API in terms of network usage
  • Can be more difficult to implement and maintain

3. GraphQL API:

  • Allows clients to request exactly the data they need
  • Provides a single endpoint for clients to make requests
  • Can reduce the number of requests needed to get all required data
  • Can be more complex to implement than RESTful API
  • May require additional tooling and libraries

4. SOAP API:

  • Uses a messaging protocol to exchange structured information
  • Can be used with a variety of programming languages and frameworks
  • Can support more complex operations than RESTful API
  • Can be more difficult to implement and maintain

5. Hypermedia API:

  • Includes links between resources, allowing for dynamic discovery and navigation
  • Can improve the flexibility and adaptability of an API
  • May require additional tooling and libraries
  • Can be more difficult to implement and maintain

6. Event-driven API:

  • Sends notifications to clients when certain events occur
  • Can reduce the need for clients to repeatedly poll for updates
  • Can be useful for real-time applications
  • Can be more difficult to implement and maintain

7. Message Queue API:

  • Allows applications to send and receive messages asynchronously
  • Can provide a reliable and scalable way to process messages
  • Can be useful for distributed systems
  • May require additional infrastructure and tooling

In general, the choice of API design pattern will depend on the specific needs of the project and the system architecture. RESTful API is often a good choice for simple CRUD operations, while GraphQL may be a better choice for complex queries. RPC API and SOAP API can be more efficient for certain types of operations but can be more complex to implement and maintain. Hypermedia API, event-driven API, and message queue API can be useful for certain types of systems and applications but may require additional tooling and infrastructure.

REST API Design Patterns

When designing API projects, enterprises prefer to build upon the REST best practices and guidelines for web services.

REST (Representational State Transfer) API (Application Programming Interface) design patterns are a set of best practices and conventions for designing web services that follow the principles of the REST architectural style. These patterns are used to structure the endpoints, resources, and data models of RESTful APIs in a way that promotes simplicity, scalability, and ease of use.

Some common REST API design patterns include:

  • Resource-Based: This pattern focuses on organizing API endpoints around resources, which represent entities in the system being exposed via the API.
  • CRUD (Create, Read, Update, Delete): This pattern is a common approach for defining the four basic operations (create, read, update, delete) that can be performed on a resource.
  • HATEOAS (Hypermedia as the Engine of Application State): This pattern involves including hyperlinks in API responses that allow clients to discover and navigate the API resources.
  • Filter and Pagination: This pattern involves implementing filtering and pagination capabilities to allow clients to efficiently retrieve subsets of data from a resource.
  • Versioning: This pattern involves providing different versions of an API to support changes in the API without breaking existing clients.

By following these and other REST API design patterns, developers can create APIs that are easy to understand, maintain, and use, and that can scale to meet the needs of large and complex systems.

Understanding REST API design- 6 Key constraints every engineer must know

When designing a REST API, it is important to be aware of several key constraints that define the characteristics and capabilities of the API. These constraints are:

  1. Client-server architecture: This constraint requires that the client and server be separated from each other, with each responsible for a specific set of functionalities. This separation allows for greater scalability and flexibility in the system, as the client and server can be updated or replaced independently of each other.
  2. Statelessness: A RESTful API should be stateless, meaning that each request contains all the necessary information for the server to understand and respond to it. The server does not maintain any session state between requests, which makes the system more scalable and easier to manage.
  3. Cacheability: REST APIs should be designed to take advantage of caching, which can improve performance by reducing the number of requests sent to the server. Responses should include information that allows clients to determine whether the response can be cached, and for how long.
  4. Layered system: A RESTful API should be designed as a layered system, where each layer provides a specific set of functionalities. This allows for greater flexibility in the system, as layers can be added, removed, or modified without affecting the rest of the system.
  5. Uniform interface: The uniform interface constraint defines the standard interface that all components of the API must adhere to. This includes the use of standard HTTP methods (GET, POST, PUT, DELETE) for CRUD operations, as well as a consistent data format (usually JSON or XML) for requests and responses.
  6. Code on demand: This is an optional constraint that allows for executable code to be transferred from the server to the client, which can add additional functionality and flexibility to the API. However, this constraint is not commonly used in RESTful APIs and should be used with caution, as it can add complexity to the system.

RESTful API Design Patterns: A Comprehensive Overview

No alt text provided for this image

The diagram shows the different components and design patterns that can be used in RESTful API design. The client makes HTTP requests to interact with the resources. The resources can be either collections or items, and the HTTP methods used to interact with them include GET, POST, PUT, and DELETE.

Additionally, there are other design patterns such as filters, pagination, search, and sorting that can be applied to resources. The API can also support actions that do not map to CRUD operations, and these can be implemented using custom endpoints.


To sum up, the diagram shows that RESTful APIs can support multiple data formats such as JSON, XML, etc., and can also use versioning techniques to manage changes to the API over time.

RESTful API Best Practices

RESTful APIs have become the standard for building web services that are scalable, flexible, and easy to maintain. However, building a successful RESTful API requires careful planning, implementation, and testing. In this answer, we'll cover some of the best practices for building a RESTful API, as well as some common pitfalls to avoid.

Best Practices to be considered:

  1. Follow the REST architectural style: The REST architectural style defines a set of constraints that must be followed to build a RESTful API. These constraints include using HTTP methods correctly, using resource URIs, and using hypermedia to link resources. Make sure you follow these constraints to ensure that your API is consistent, reliable, and easy to understand.
  2. Use HTTP methods correctly: Use HTTP methods like GET, POST, PUT, and DELETE to perform the appropriate action on a resource. For example, use GET to retrieve a resource, POST to create a new resource, PUT to update an existing resource, and DELETE to delete a resource.
  3. Use resource URIs: Use resource URIs to identify resources in your API. The URI should be unique and consistent, and it should not include any implementation details. For example, instead of using a URI like /API/users/getUserById, use a URI like /API/users/123.
  4. Use hypermedia to link resources: Use hypermedia to link resources in your API. Hypermedia allows clients to discover related resources and navigate the API without having to know the implementation details. Use hypermedia formats like HAL, JSON-LD, or Siren to provide links to related resources.
  5. Use versioning: Use versioning to ensure that changes to your API do not break existing clients. Include a version number in the URI or in the HTTP header to indicate which version of the API is being used.
  6. Use authentication and authorization: Use authentication and authorization to secure your API. Use OAuth 2.0 or a similar protocol to authenticate clients and control access to resources.
  7. Use error handling: Use error handling to provide informative error messages when errors occur. Use HTTP status codes to indicate the type of error, and include an error message in the response body.
Events in Lightning web components (LWC)


What Is Events In Lightning Web Components?

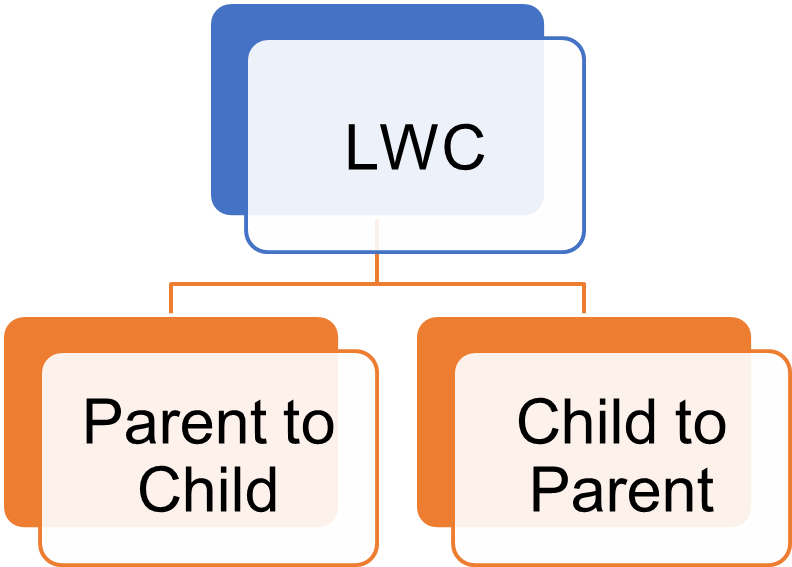
Events are used in LWC for components communication. There are typically 3 approaches for communication between the components using events.

  1. Parent to Child Event communication in Lightning web component
  2. Custom Event Communication in Lightning Web Component (Child to Parent )
  3. Publish Subscriber model in Lightning Web Component or LMS (Two components which doesn’t have a direct relation )

NOTE:- If you want to communicate the Lightning web component with Visualforce page then we can use LMS.

Events in Lightning web components
Event communication in LWC

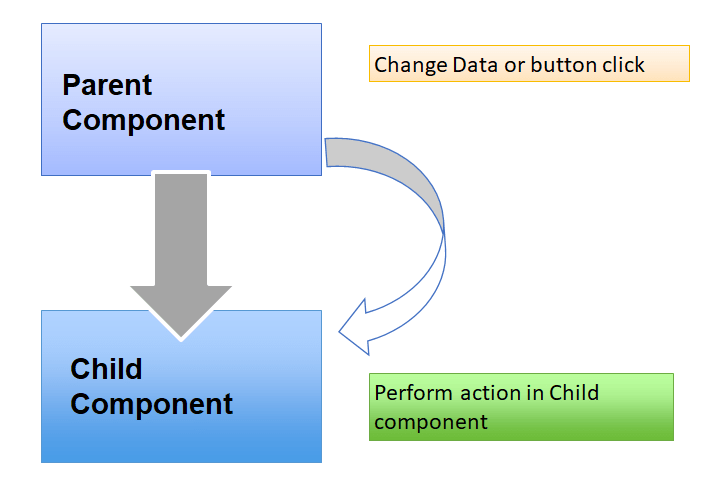
1) Parent To Child Event Communication In LWC

In Aura framework, we can call the method of Child Component from the Parent Component with the help of <aura:method>. In LWC Aura Methods Become JavaScript Methods.

Parent to Child Event communication in LWC

Lightning web component we can pass the details from parent to child using below two way

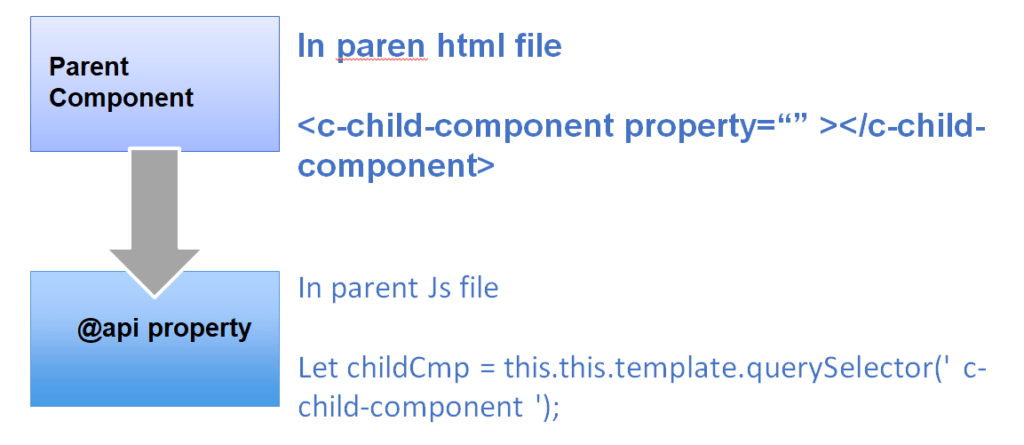
  1. Public Method
  2. Public properties.

We have use the @api decorator to make the children properties / method public available so parent.

Public Method

We can use the @api decorator to make the method public available so parent can be able to call it directly using JavaScript API. For example create one public method (which we need to access in parent component) in ChildComponent with @api decorator like below

ChildComponent

@api
changeMessage(strString) {
     this.Message = strString.toUpperCase();
}

To access the above child method in parent component we can do like that.

ParentComponent

this.template.querySelector('c-child-component').changeMessage(event.target.value);

The querySelector() method is a standard DOM API that returns the first element that matches the selector

@api decorator to make the children properties

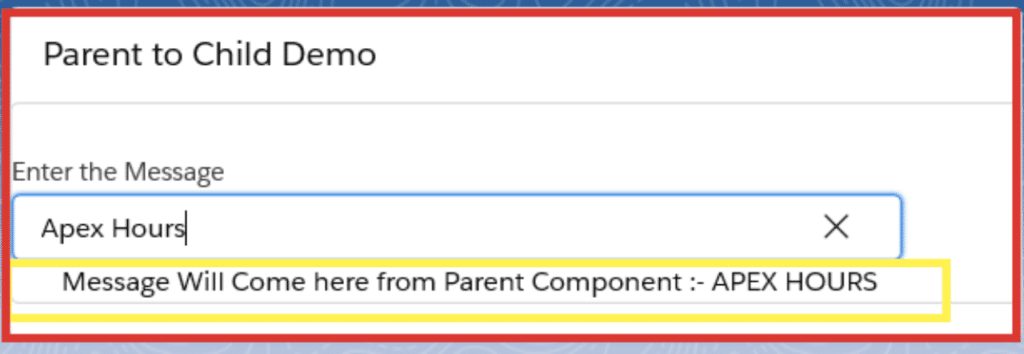
Lets take one example to pass value from parent component to child component.

Step 1) Create one child Component to show message from parent component

childComp.html

<template>
    Message Will Come here from Parent Component :- {Message}
</template>

Step 2) Create javaScript method in child component to assign value on child attribute

childComp.js

import { LightningElement, track, api } from 'lwc';
export default class ChildComponent extends LightningElement {
    @track Message;
    @api
    changeMessage(strString) {
         this.Message = strString.toUpperCase();
    }
}

Step 3) Create one Parent Component to call child component

ParentComponent.html

<template>
    <lightning-card title="Parent to Child Demo">
        <lightning-layout>

            <lightning-layout-item flexibility="auto" padding="around-small"  >
                <lightning-input label="Enter the Message" onchange={handleChangeEvent}></lightning-input>
            </lightning-layout-item>
          
            <lightning-layout-item flexibility="auto" padding="around-small">
                <c-child-Comp></c-child-Comp>
            </lightning-layout-item>
          
        </lightning-layout>
    </lightning-card>   
</template>

Step 4) Now Create JavsScript method in Parent component to call child method with “this.template.querySelector”.

ParentComponent.js

import { LightningElement } from 'lwc';

export default class ParentComponent extends LightningElement {
    handleChangeEvent(event){
        this.template.querySelector('c-child-Comp').changeMessage(event.target.value);
    }
}

Step 5) Update your meta.js file to make this component available for App, home page.

<?xml version="1.0" encoding="UTF-8"?>
<LightningComponentBundle xmlns="http://soap.sforce.com/2006/04/metadata" fqn="parentComponent">
    <apiVersion>45.0</apiVersion>
    <isExposed>true</isExposed>
    <targets>
        <target>lightning__AppPage</target>
        <target>lightning__RecordPage</target>
        <target>lightning__HomePage</target>
    </targets>
</LightningComponentBundle>
Parent to child communication

Public properties

You can make a component property public by prefacing it with the @api decorator. Then, set the public property by an external component

For example, if the c-todo-item child component has the following:

import { LightningElement, api } from 'lwc';
export default class TodoItem extends LightningElement {
   @api itemName;
}

Set the value from the parent with the following:

<template>
    <c-todo-item item-name="Milk"></c-todo-item>
</template>

Public properties are great solutions for passing down primitive values, simple objects, and arrays.

2) Custom Event Communication In Lightning Web Component (Child To Parent)

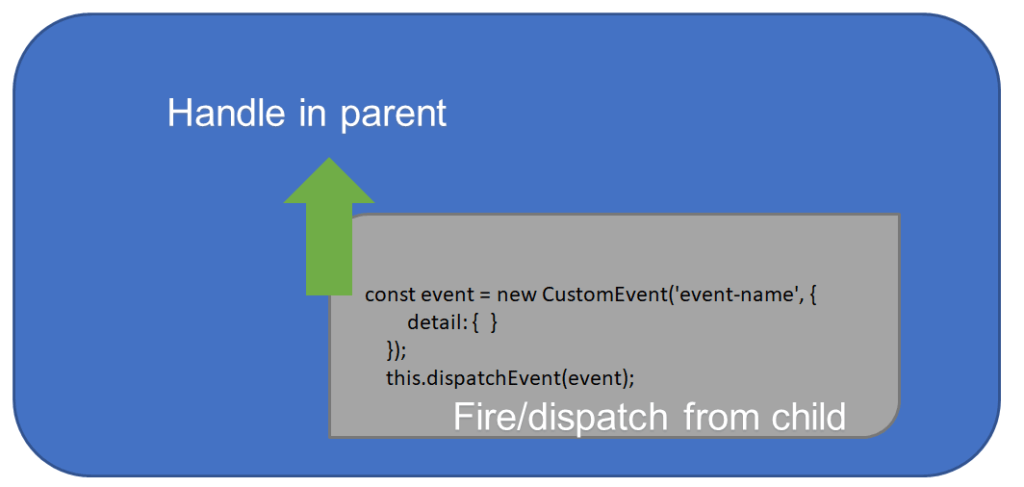
Custom Event is used to make the communication from Child Component to Parent Component. With LWC we can create and dispatch the custom event.

  1. Create and Dispatch an Event
    • Create Event : We can use the customEvent() constructor to create an event. In constructor we need to pass custom event name and detail of the event. new customEvent(eventName, props);
    • Dispatch Event : We have to dispatch an event at with EventTarget.dispatchEvent() method.  this.dispatchEvent(new customEvent(eventName, props);
  2. Handle an Event : There are two ways to listen to an event
    • Declarative via html markup : We need to add “on” prefix in the event name in Parent Component during calling of Child Component for Declaratively event listener. ParentComponent    <template>
                <c-child-component oneventName={listenerHandler}></c-child-component >
           </template>
    • JavaScript using addEventListener method : We can explicitly attach a listener by using the addEventListner method in the parent component like below : ChildComponent this.template.addEventListener('eventName', this.handleNotification.bind(this));
Custom event communication in Lightning Web Component (Child to Parent)

Lets take one example for “Declarative via html markup

Step 1) Create one child component component from where we will raise a event

Create child html file to get value from user

childComp.html

<template>
    <lightning-card title="Child Component">
        <div class="slds-m-around_medium">
            <lightning-input name="textVal" label="Enter Text" onchange={handleChange}></lightning-input>
        </div>
    </lightning-card>
</template>

Step 2) Now update Child Comp javaScript file to raise a CustomEvent with text value

childComp.js

import { LightningElement } from 'lwc';

export default class ChildComp extends LightningElement {

   handleChange(event) {
        event.preventDefault();
        const name = event.target.value;
        const selectEvent = new CustomEvent('mycustomevent', {
            detail: name
        });
       this.dispatchEvent(selectEvent);
    }
}

Step 3) Create one Parent component where we will handle the event

Now create parent component. We need to add prefix as “on” before the custom event name and in parent component we need to invoke the event listener as handleCustomEvent using onmycustomevent attribute. we recommend that you conform with the DOM event standard.

  • No uppercase letters
  • No spaces
  • Use underscores to separate words

ParentComponent.html

<template>
    <div class="slds-m-around_medium">
        Value From Child :  {msg}
        <c-child-comp onmycustomevent={handleCustomEvent}></c-child-comp>
    </div>
</template>

Now update parent component javaScript file and add handleCustomEvent method

ParentComponent.js

import { LightningElement , track } from 'lwc';

export default class ParentComponent extends LightningElement {
    @track msg;
    handleCustomEvent(event) {
        const textVal = event.detail;
        this.msg = textVal;
    }
}

Output :-

Lets see how we can use  “JavaScript using addEventListener method | Attaching event Listener Programmatically”

Step 1) We can use the same above sample and do below change in parent component

Update parent component JavaScript like below

ParentComponent.js

import { LightningElement , track } from 'lwc';

export default class ParentComponent extends LightningElement {
    @track msg;
  
    constructor() {
        super();   
        this.template.addEventListener('mycustomevent', this.handleCustomEvent.bind(this));
    }

    handleCustomEvent(event) {
        const textVal = event.detail;
        this.msg = textVal;
    }
}

Remove onmycustomevent attribute from child component tag. like below

ParentComponent.html

<template>
    <div class="slds-m-around_medium">
        Value From Child :  {msg}
        <c-child-comp ></c-child-comp>
    </div>
</template>

Step 3) Set the bubbles: true while raising the event like below

childComp.js

import { LightningElement } from 'lwc';

export default class ChildComp extends LightningElement {

   handleChange(event) {
        event.preventDefault();
        const name = event.target.value;
        const selectEvent = new CustomEvent('mycustomevent', {
            detail: name ,bubbles: true
        });
      this.dispatchEvent(selectEvent);
    }
}

Event Propagation: When an event is fired the event is propagated up to the DOM. Event propagation typically involves two phases event bubbling and event capturing. The most commonly used event propagation phase for handling events is event bubbling. In this case the event is triggered at the child level and propagates up to the DOM. Where as event capturing phases moves from top to bottom of the DOM. This phase is rarely used for event handling.

The below picture shows the event phases both in capture and bubbles phase. In LWC we have two flags which determines the behavior of event in event bubbling phase.

  1. bubbles A Boolean value indicating whether the event bubbles up through the DOM or not. Defaults to false.
  2. composed A Boolean value indicating whether the event can pass through the shadow boundary. Defaults to false.

reference

3) Publish Subscriber Model In Lightning Web Component.

Application Events in aura become a Publish-Subscribe Pattern in Lightning web components. We use an library called pubsub to achieve the communication between two components which doesn’t have a direct relation to each other. This works like a typical publish subscribe model. Where an event is subscribed by a component and handled when another component which fires/publishes the event within the same scope.

Pubsub module support below three method

  1. Register 
  2. UnRegister
  3. Fire

Follow below step for Pub Sub module

Step 1) import Pub Sub file from here.

Step 2) Register the Event

Add JavaScript Code in Component to register and unregister the event. In this JS file, invok registeredListener() and unregisterAllListeners() in the respective methods such as connectedCallback() and disconnectedCallback().
MyComponent.js

import { registerListener, unregisterAllListeners} from 'c/pubsub';
export default class MyComponent extends {

    @track Message;
    connectedCallback() {
        registerListener('messageFromSpace', this.handleMessage, this);
    }
   
    handleMessage(myMessage) {
        this.Message = myMessage;
        //Add your code here
    }
   
    disconnectCallback() {
        unregisterAllListeners(this);
    }
}

Step 3) Fire the event

Fire the event from other Component. In that js file, We need to trigger the event with name and value. Remember, we also need to send the page reference attribute as current page reference for successful communication
OtherComponent.js

import {  fireEvent } from 'c/pubsub';
import { CurrentPageReference } from 'lightning/navigation';
export default class OtherComponent extends LightningElement {
     @track myMessage;
     @wire(CurrentPageReference) pageRef;

     sendMessage() {
          fireEvent(this.pageRef, 'messageFromSpace', this.myMessage);
     }
}